


I had been dreaming of making a teepee
for a long time, since my oldest was a wee little guy.
It's on our summer bucket list
and now that I have tackled this project
and now that I have tackled this project
I LOVE IT!!
even more so
I LOVE that my BOYS LOVE IT!!
It's been sooo hot here
so this has helped keep us busy inside on these sweltering summer days...

It's been sooo hot here
so this has helped keep us busy inside on these sweltering summer days...

{warning, long post since it's a tutorial, but stick around for the sweet faces at the end!}
With four little ones I can't just clip up a sheet,
they'd pull it down and I wanted something that looked like a teepee.
They little boys all share a room right now and
we have so many playtents in our home.
I wanted something that took up less space with more room
but it had to be removable for when we need the space.
So I came up with a design using grommets,
been lovin' grommets lately,
and some twill tape and fabric that I had planned for a valance.
You will also see my new applique pillows from this tutorial.
The Making of a Removable, Grommet Mounted TeePee!
{do I sound excited because I am...you'd think it was for me!}


The teepee is hung using twill tape and a ceiling hook
and is attached to the wall by three hooks using grommets.
There are a lot of steps, but they are super easy to follow and so worth it
for all the fun to be had in it!!
Supplies
all are quite inexpensive, of course your fabric choice will factor in
fabric
45" decorator fabric x 3 yards
coordinating thread
twill tape
7 yards twill tape at least 1/2 inch width
grommets
3/8" size (3) and grommet punch
hardware
1 1/4" cup hooks white (3)
all-purpose ceiling hook white (1)
Carabiner type clip {1}
Carabiner type clip {1}
Sewing
Fold fabric in 1 1/2" on length and using standard stitch create a seam
along entire length of fabric

Repeat on along the opposite length of fabric.
Then do same along width of the fabric.
Each side 1 1/2" fold in and sew with a standard stitch.

For a bit less bulk you can fold the corners as I have shown here,
just sew down the diagonal.

After both widths of the fabric are sewn,
take your twill tape and sew it on the back side of the fabric
straight down the middle of the fabric.
You will want to use 4 1/2 yards of the twill tape for this step.
Have the twill tape align with the edge of the fabric,
the excess will hang off the other end.

Next we will add the ruching detail.
I didn't want the teepee sides to just lay flat, so
the ruching of the sides adds some weight.
Two separate pockets are created so once the teepee is hung,
each side can be ruched separately {the deluxe teepee version}
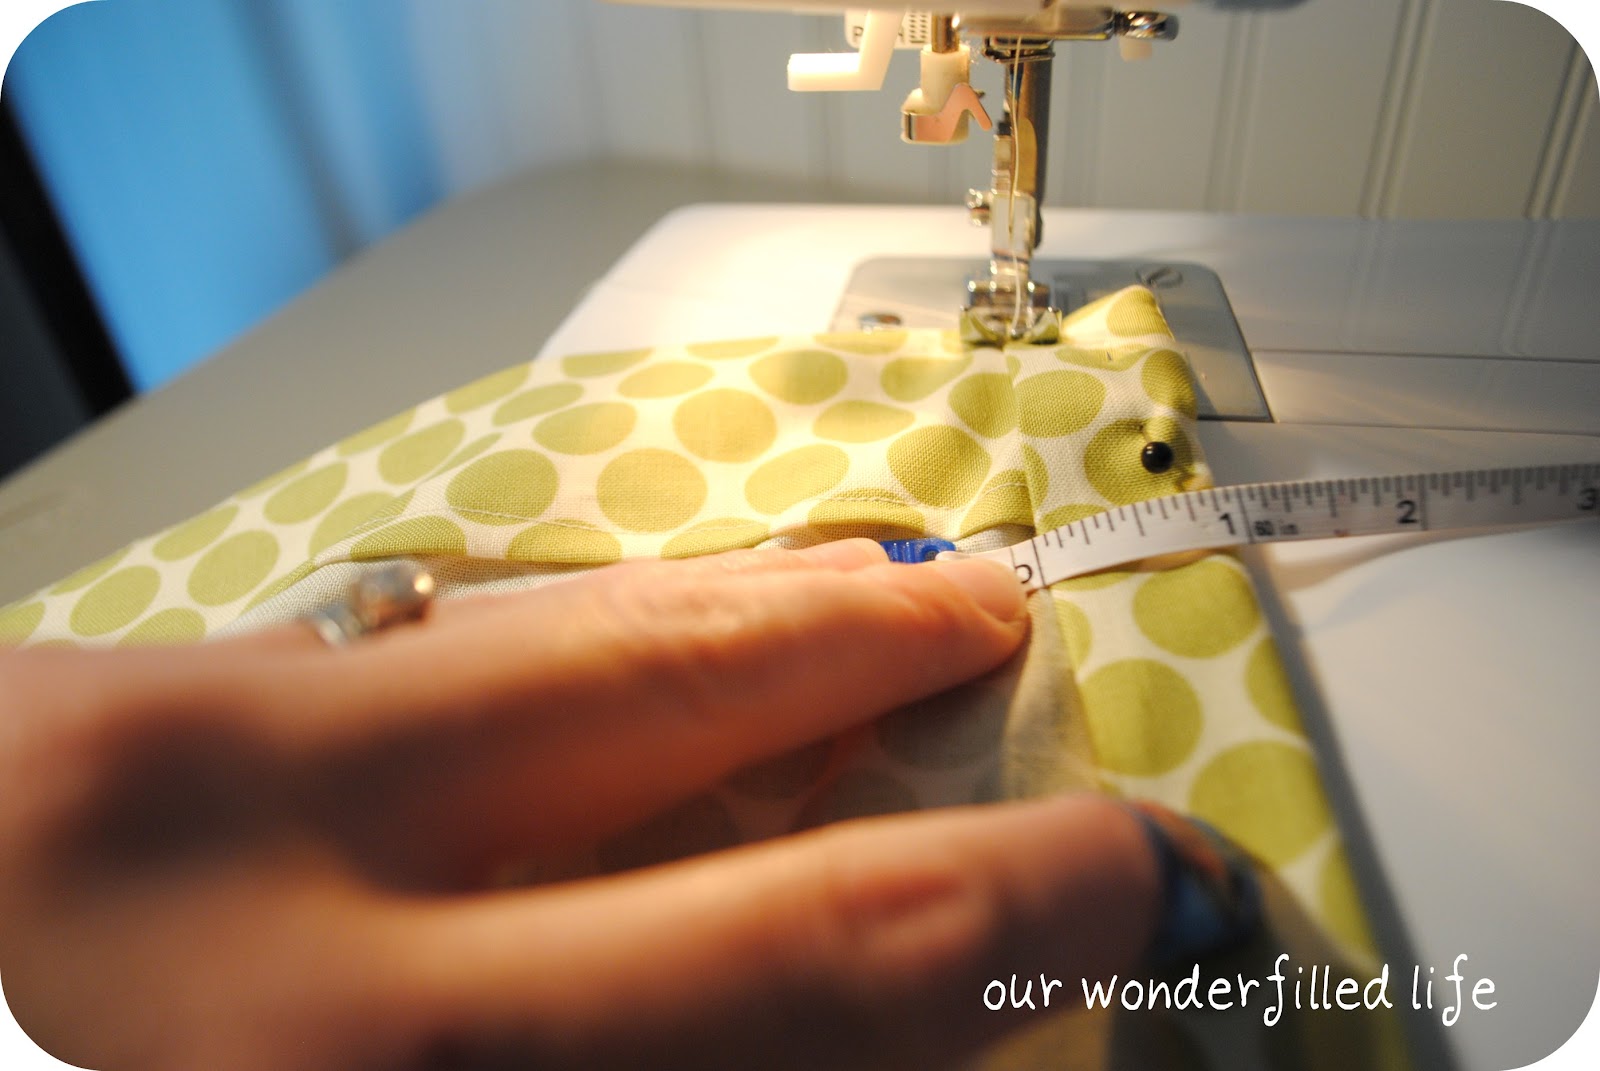
Take the length {side} without excess twill tape.
Fold it in 1 inch and stitch along the edge.
Stopping right before the twill tape.


Find your excess twill tape, and cut in in half.
Time to grab a cute little helper with little hands!
Pin one end of your excess twill tape


Cut both twill tapes from the pockets to end at the edge of fabric
Do not cut center twill tape!
Sew both pieces down to fabric.

Then sew center line twill tape over as shown below.

Remove safety pins from opposite ends and secure
I used a couple wooden beads we had {hey it works!}

Grommets
Folding over the fabric above when sewing helped to build up the
fabric to hold the grommets and the weight of being hung.
The grommets are best at the 2 corners and middle edge of the fabric.
So, all grommets will be on the length of the fabric without the excess twill tape.
This is the length of the teepee that will be against the wall.

Mark 3 x's on the fabric for grommet placement.

Follow instructions on your grommet punch
{summon mad amounts of hand strength!}


Hardware Mounting

The spacing worked out perfectly around the windows in the boys room.
We can still get to the blinds behind the teepee.
Mark 3 spaces on the wall and screw the 3 cup hooks into the wall by hand.
Place a grommet on each hook and then pull up the twill tape to the ceiling
and mark the placement for the ceiling hook.


Install ceiling hook with drill and hardware provided.
Hang, ruche away, fuss with, make it look nice
and place a comforter, some big pillows, books, etc. underneath!
I added the flag bunting as a little touch at the end.
I cut out double triangles for each flag, alternating fabrics and
making flags smaller as they reached the ceiling.
Secured with tacky glue until placement was correct
and then took down and sewed together.
I like the sweet touch it adds!


Think they like it?!

Seeing their reactions was sooo great...seriously they were giddy!!
I know they will have hours of fun in their room
under their new little teepee!!
I also added a couple push lights, they love turning them on and off
and we can turn down the lights at bedtime and just chill and play!
I'd love to see any removable teepees that you create.
I do ask if you use this tutorial that you
kindly source it in your post {thank you!}
Please feel free to email me pictures or with any questions on this tutorial.
michelle{at}ourwonderfilledlife{dot}com.


take your twill tape and sew it on the back side of the fabric
straight down the middle of the fabric.
You will want to use 4 1/2 yards of the twill tape for this step.
Have the twill tape align with the edge of the fabric,
the excess will hang off the other end.

Next we will add the ruching detail.
I didn't want the teepee sides to just lay flat, so
the ruching of the sides adds some weight.
Two separate pockets are created so once the teepee is hung,
each side can be ruched separately {the deluxe teepee version}
Take the length {side} without excess twill tape.
Fold it in 1 inch and stitch along the edge.
Stopping right before the twill tape.

Find your excess twill tape, and cut in in half.
Time to grab a cute little helper with little hands!
Pin one end of your excess twill tape

and thread it through the little pocket you just created,
pulling it out right next to the other twill tape.

Pin both ends so you do not lose the twill tape inside the pocket.
Repeat and sew a pocket again toward the center,
thread the twill tape through and secure opposite ends with safety pins.

Cut both twill tapes from the pockets to end at the edge of fabric
Do not cut center twill tape!
Sew both pieces down to fabric.


Remove safety pins from opposite ends and secure
I used a couple wooden beads we had {hey it works!}

Grommets
Folding over the fabric above when sewing helped to build up the
fabric to hold the grommets and the weight of being hung.
The grommets are best at the 2 corners and middle edge of the fabric.
So, all grommets will be on the length of the fabric without the excess twill tape.
This is the length of the teepee that will be against the wall.

Mark 3 x's on the fabric for grommet placement.

Follow instructions on your grommet punch
{summon mad amounts of hand strength!}

Hardware Mounting

The spacing worked out perfectly around the windows in the boys room.
We can still get to the blinds behind the teepee.
Mark 3 spaces on the wall and screw the 3 cup hooks into the wall by hand.
Place a grommet on each hook and then pull up the twill tape to the ceiling
and mark the placement for the ceiling hook.

Install ceiling hook with drill and hardware provided.
Hang, ruche away, fuss with, make it look nice
and place a comforter, some big pillows, books, etc. underneath!
I added the flag bunting as a little touch at the end.
I cut out double triangles for each flag, alternating fabrics and
making flags smaller as they reached the ceiling.
Secured with tacky glue until placement was correct
and then took down and sewed together.
I like the sweet touch it adds!

a few more cozy things...
Think they like it?!

Seeing their reactions was sooo great...seriously they were giddy!!
I know they will have hours of fun in their room
under their new little teepee!!
I also added a couple push lights, they love turning them on and off
and we can turn down the lights at bedtime and just chill and play!
I'd love to see any removable teepees that you create.
I do ask if you use this tutorial that you
kindly source it in your post {thank you!}
Please feel free to email me pictures or with any questions on this tutorial.
michelle{at}ourwonderfilledlife{dot}com.
I have also been collecting
teepee inspiration via Pinterest.
This morning, I am linking up my teepee to...

{yay, so fun!}
As well as linking up this tutorial to these lovely parties this week!
{thank you!}
And just to bring it full circle, I added my teepee tutorial to pinterest! {grin}
And just to bring it full circle, I added my teepee tutorial to pinterest! {grin}
Thank you!
